


even though my husband and i have been married for several years, we never had our own stockings until last year. the reason being that we lived close to family and so was always at someone else’s house for christmas day – and both my mother and mother-in-law had plenty of stockings to spare. so when we moved far away last year it didn’t dawn on me until the first week of december that we didn’t even have stockings of our own to hang in our house for christmas.
i took to etsy to see if i could buy some, but the ones that i liked were SO expensive. and at that point in december the wouldn’t even be delivered by christmas. so…i enlisted my sister to help me make my own. and i absolutely love them. and they weren’t very hard to make at all. here’s how we did it:
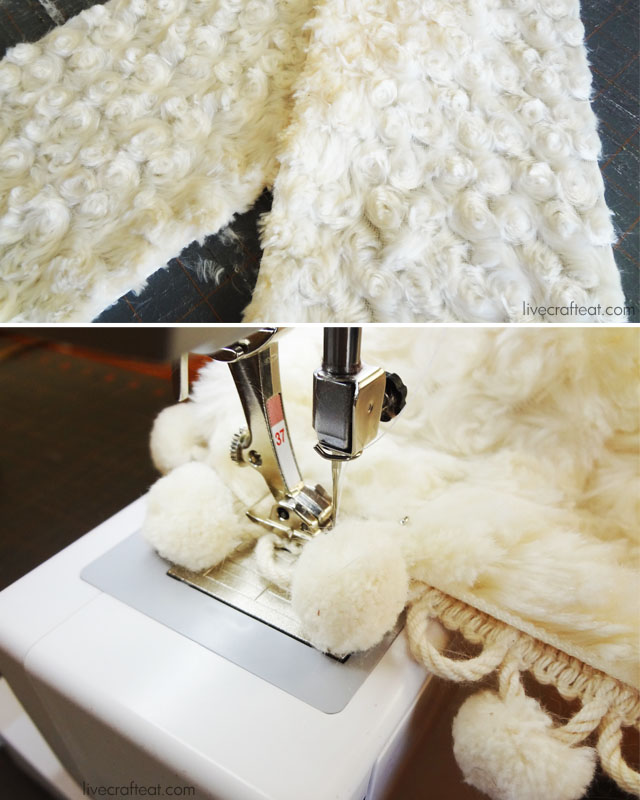
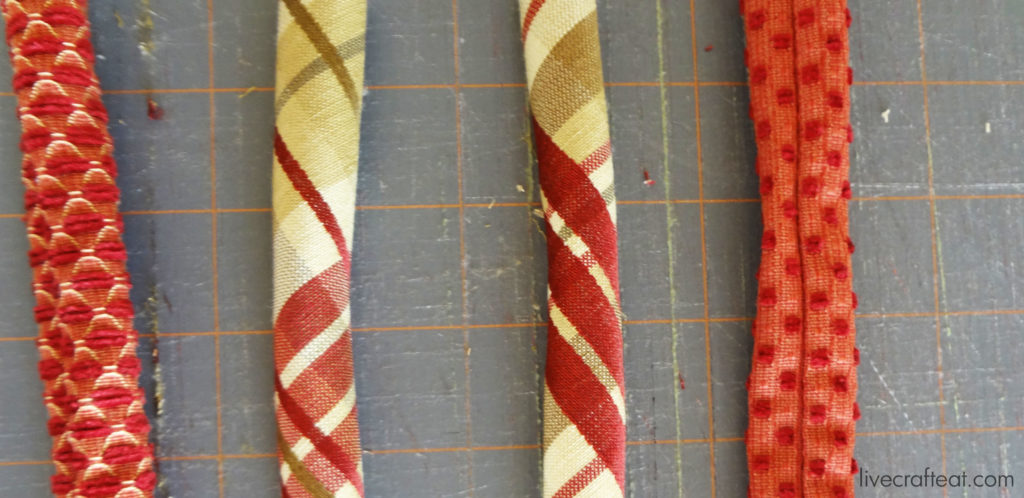
1. we bought fabric (which was still way cheaper than buying stockings online or at the store!) – we used upholstery fabric because it’s so much thicker and stiffer than regular fabric. we also bought a minky-type material for the cuff. it reminded us of santa’s beard! the last thing we needed was a pom-pom trim to add onto the cuff. 2 main fabrics + trim = easy.
next, we made a stocking pattern. you can make your own by free-handing it, finding a free pattern online, or by using a friend or neighbor’s stocking as a starting point and tracing theirs. once you have a pattern you like, pin everything into place and cut around the edge. for each stocking, you’ll need a front and a back (so a “J” and an “L”…so to speak).
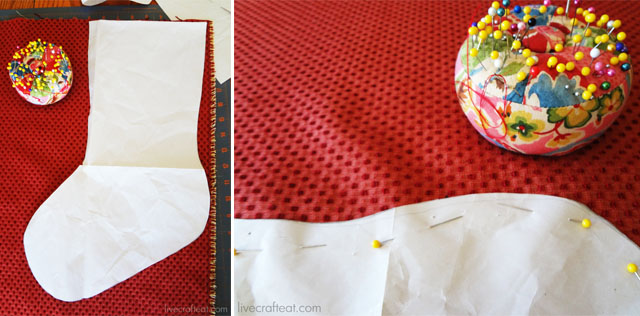
2. with right sides of the fabric facing each other, sew a 1/4 inch seam around the entire outside of the stocking, except for the opening in the top. after you’ve done the seam, go around again using a zig-zag stitch as close to the edge of the fabric as possible. this will prevent it from fraying too much.
turn the stocking right-side-out.
3. measure the circumference of the top of your stocking. add an extra .5 inch. this is the number you need for the length of your cuff. the width of your cuff depends on how long you like it on your stocking – hold it up to your stocking and adjust it until you get it just right.
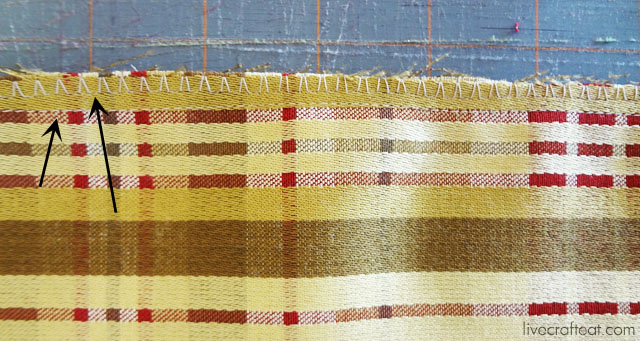
next, add the trim. there may be a selvage edge of your cuff material. if so, sew the trim onto that edge. if you do not have a selvage edge, fold the very bottom edge of the fabric up underneath itself once or twice and then sew on the trim. you don’t want to see any raw edges when the stocking is all done.
once the trim is on, fold the cuff in half with right sides facing each other and sew a 1/4 in seam.
4. before we get the whole stocking sewn together you’ll also need to make a hook to hang your stocking with. cut a 1-inch x 6-inch piece of scrap fabric. with right sides facing, sew a 1/8 inch seam up the whole length of the fabric strip. pin a safety pin to one end and use it to turn the tube inside out.
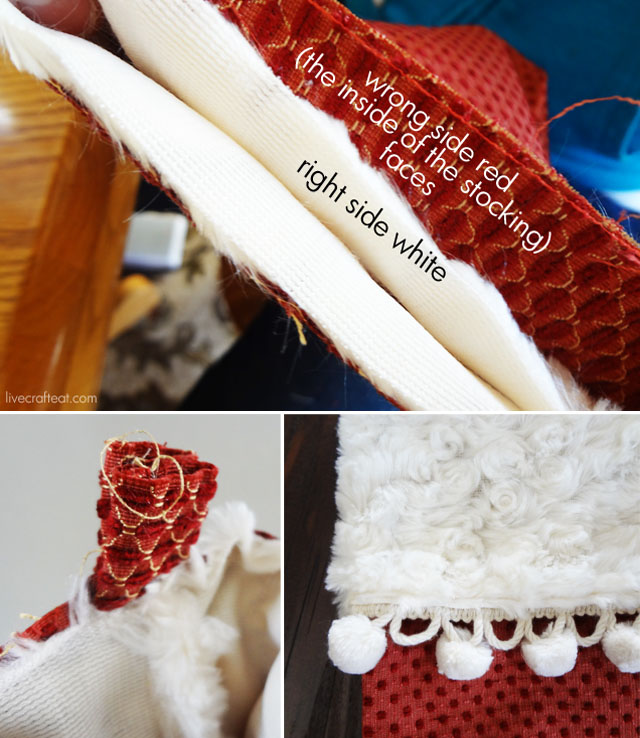
4. to attach the cuff, first make sure the stocking is right-side-out. place the cuff inside the stocking with right side facing the wrong side of the stocking, as in the picture below. make sure the raw edges are all at the top. pin into place.
on the corner where the stocking will hang, place the hook, folded in half with the loop on the inside of the stocking. there should only be about an inch or so of the raw ends sticking out the top (see picture below).
pin everything into place and sew. when you’re done, pull the cuff out of the stocking and fold over the top edge. see how nice it looks!?
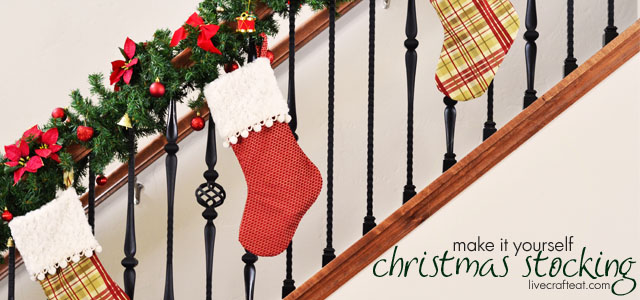
hang your stockings on your fireplace or stair rail, or anywhere that santa will be able to see them.
now you have stockings as beautiful as the ones you’ve seen for sale, but it’s only cost you a fraction of the price and took you very little time to make! plus, you get to pick your own fabric and trim, so you know it’s going to be exactly what you wanted.

now it’s up to santa to figure out how he’s going to fill these things….
So beautiful! Next time my sister’s at my place with her sewing machine I want to make some!
i’m sure she’d love to help! 🙂